Install Flmngr as a standalone microservice
Microservice Flmngr server is a prebuilt app that serves file manager HTTP requests on some port from a some storage directory, which is set in the config file. It perfectly works together with NGinx or other HTTP reverse proxy server.
This is useful when you don't have an existing Node app and only need to run a Flmngr backend to support the file manager on your website.
Another case is if you need to run the Flmngr backend on a server that is different from the main website, on a subdomain, etc.
The benefit of the standalone service is that you don't need to create a Node project: you just download the app, set the domain, port, and path in the config, and just run it from the terminal.
Requirements
The standalone app is a precompiled server. It requires Node.js >= 14.15.0 to be installed on your server.
You can check the version you are using with the node -v command.
Install
Download the archive with the server an unpack it into a directory on your server.
Alternatively, you can clone our GitHub repository (you may also fork it) with the same result, as it already contains a build:
Go into the downloaded directory and install all its dependencies:
npm iand build it:
npm run buildConfigure
See the file flmngr.conf in the root of the directory and optionally edit the options. They are:
host— the host server to listen onport— the port server to listen onurlFileManager— the URL of the Flmngr endpoint that will process all requests. Use the absolute URL form without a host or port.urlFiles— the URL of the served public directory with files (read-only). Flmngr will create links to this URL when a user inserts an image using the file manager. Use the absolute URL form without a host or port. This is an optional value, but if you omit it, you will need to serve the storage directory with some other server, for example directly through Nginx.dirFiles— the path of the directory in the server file system (not a URL)../filesmeans a directory in the current folder (sample files are shipped with this server), but you can use an absolute path to your directory (and this is recommended).
Run
Start the service by typing the following command in the terminal:
npm run startYour current directory must be the directory of the Flmngr microservice server.
Autostart
Make changes to your startup scripts (e.g., systemd on Linux servers) to run the Flmngr server when the server restarts. We recommend adding there the following command: cd /path/to/flmngr-server-microservice/ && npm run start
Do not forget to change the path in this command to point to the directory where you installed the microservice.
NGinx
The most popular (but optional) case is to run this microservice through NGinx HTTP reverse proxy server. This allows you to add the microservice to a centralized HTTP server configuration and also use SSL certificates (to enable HTTPS connections) using NGinx. NGinx also provides other tools such as configuring the number of parallel requests and other useful features that can improve your server's availablity.
The sample configuration for it is placed in the nginx.conf file.
This file shows you how to run NGinx on your domain (uncomment this option and specify your domain) and proxy all requests to the Flmngr microservice app, which is running locally.
You can also change the routes here (but this will affect linking with the file manager). It's recommended to have the same routes both in the Nginx config file and in the Flmngr microservice config.
Note: Never add any CORS headers to the NGinx route to avoid their duplication (if you do, the browser will ignore both of them), because the Flmngr microservice already adds them to allow Flmngr to work on one domain and the microservice on another (in case you have such a configuration).
In order to let NGinx use this config, you must link or copy this file into the sites-enabled folder of NGinx (usually /etc/nginx/sites-enabled in Unix environments). Then, test the configuration to be sure:
nginx -tand reload the configuration to apply it:
service nginx reloadIf you are using this microservice along with other services on this server, you can merge this NGinx config with your existing config.
Link Flmngr with the server
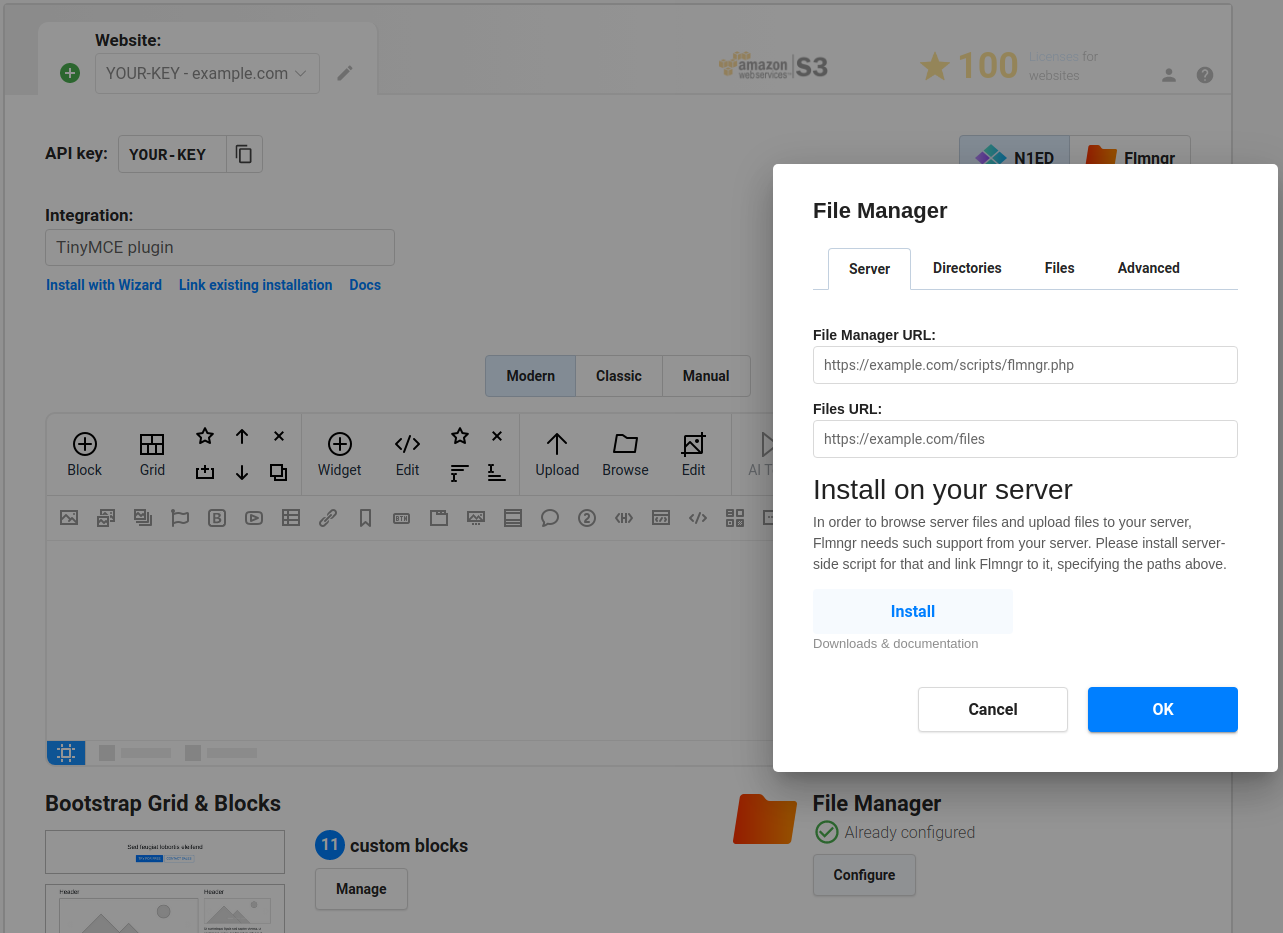
Using the visual Dashboard, you can specify the URLs of your server to link Flmngr with it.
- File Manager URL is the value you passed into the
flmngr.confconfig file asurlFileManageroption. - Files URL is the value you passed into the
flmngr.confconfig file as theurlFilesoption.

Use absolute URLs. While URLs in the Flmngr microservice config should be without a domain, but from the root of your website (e.g., /path), these URLs on the client side (in Dashboard or config) should be set in the full absolute form (e.g., http://your-domain.com/path) to avoid any possible mistakes.
Note. If you are using a HTTP reverse proxy server like Nginx, please use the URLs it maps to the internal Nest app.
Note: Alternatively, you can pass these parameters as Flmngr.urlFileManager and Flmngr.urlFiles parameters into the Flmngr config. This is useful when you need to use different directories based on the current user to support multi-user installations.
Files URL explanation
The Files URL option is the prefix Flmngr will add to any file when inserting it into your content (or returning it in the callback of your API call). If you can use Flmngr fine, but all inserted images are broken, please see this sample to understand how it works:
Flmngr.urlFiles client-side parameter
http://your-website.com/files//var/www/files/dirFiles server-side parameter
/path/to/image.pngMulti-user environment
Flmngr can work in applications where you have many users with different storages. You can programmatically specify Flmngr.urlFiles and dirFiles parameters synchronously with values based on the current user's session.