Install Flmngr into a custom app
Flmngr Node backend support popular frameworks like Express or Nest and has prepared packages for easy integration with them.
However, sometimes your NodeJS app is based on another framework or your own custom framework. This is not a problem, and you can still use the Flmngr Node backend as a library with the NPM package we provide.
Install
Install Flmngr backend library NPM package into your app or website with the following command:
npm i @flmngr/flmngr-server-node --saveManage requests
Flmngr backend needs a single endpoint to handle the entire set of requests from the file manager dialog or API.
Using the tools of your application, define the URL (File Manager URL — you will need it later for linking with the client) and go into a function that processes this request.
Now, you need to call the library function FlmngrServer.flmngrRequest(config, on) to pass the request to the Flmngr library and wait for the response in on.onFinish listener.
Your call should be made in the following way:
import {FlmngrServer} from "@flmngr/flmngr-server-node";

// ... some code of your app ...

// Call this when processing URL you set as
// File Manager URL in your app's routing code:

// onProcessURLFileManager(() => { // your routing function
    FlmngrServer.flmngrRequest(
        {
            // the path to the directory with all storage files on your server
            dirFiles: '/path/to/files',

            // optional, by default the cache will store inside dirFiles/.cache folder
            // dirCache: '/path/to/cache',

            request: {
                getParameterNumber: (name: string, defaultValue?: number) => {
                    // TODO: return a parameter with name `name`
                    // from the request in the `number` format
                },
                getParameterString: (name: string, defaultValue?: string) => {
                    // TODO: return a parameter with name `name`
                    // from the request in the `string` format
                }
                getParameterStringArray: (name: string, defaultValue?: string[]) => {
                    // TODO: return a parameter with name `name`
                    // from the request in the `string[]` format
                }
                getParameterFile: (name: string) => {
                    // TODO: return a parameter with name `name`
                    // from the request in the `{data: Buffer, fileName: string}` format
                }
            }
        },
        {
            onFinish: (
                httpStatusCode: number,
                headers: { [key: string]: string },
                response: string |                             // - only together with httpStatusCode != 200
                          { error: string|null, data: any } |  // - normal response, send this object as JSON
                          ReadStream                           // - when need to send a file
            ) => {
                // TODO: send headers and response
            },
            onLogError: (message: string) => {
                console.error(message); // or your custom call to log errors
            }
        }
    );
// });
So, you need to implement the functions of the Flmngr library interface:
getParameterNumber(..),getParameterString(..),getParameterStringArray(..),getParameterFile(..)— the set of functions must return the POST variables passed by the client.onFinish(..)— the function that must return the response from the library to the browser.onLogError(..)— the callback for logging possible errors.
Note that almost all requests are sent by the Flmngr file manager client in the application/x-www-form-urlencoded format. The only upload request (with the file inside) is sent in the multipart/form-data content encoding. There may be different functions available in your framework to parse these values from the request. However, Flmngr library does not make any difference between transport (protocol) layer of your app. You must return the value to the library regardless of the encoding in which it was received. For example, in our Express integration, we read this.req.body[name] to get a parameter in application/x-www-form-urlencoded encoding, and use a library from Busboy NPM package to parse multipart/form-data encoded requests.
GitHub sample
We recommend that you use our Express framework integration NPM package's source code as an example of how to implement all the required callbacks:
Serving files
Flmngr will display all file and directory listings in its window. However, after a user selects a file and inserts it into content, the direct link to file is generated.
To ensure that such images are displayed correctly and files can be downloaded by website visitors or application users, please serve the directory you set as the storage directory as a public directory.
This can be easily accomplished with NGinx or any other HTTP server you use as a reverse proxy.
Also when using NGinx and mapping the URL of the file manager, do not include any CORS headers in the response, as the Flmngr backend already takes care of it.
Link Flmngr with the server
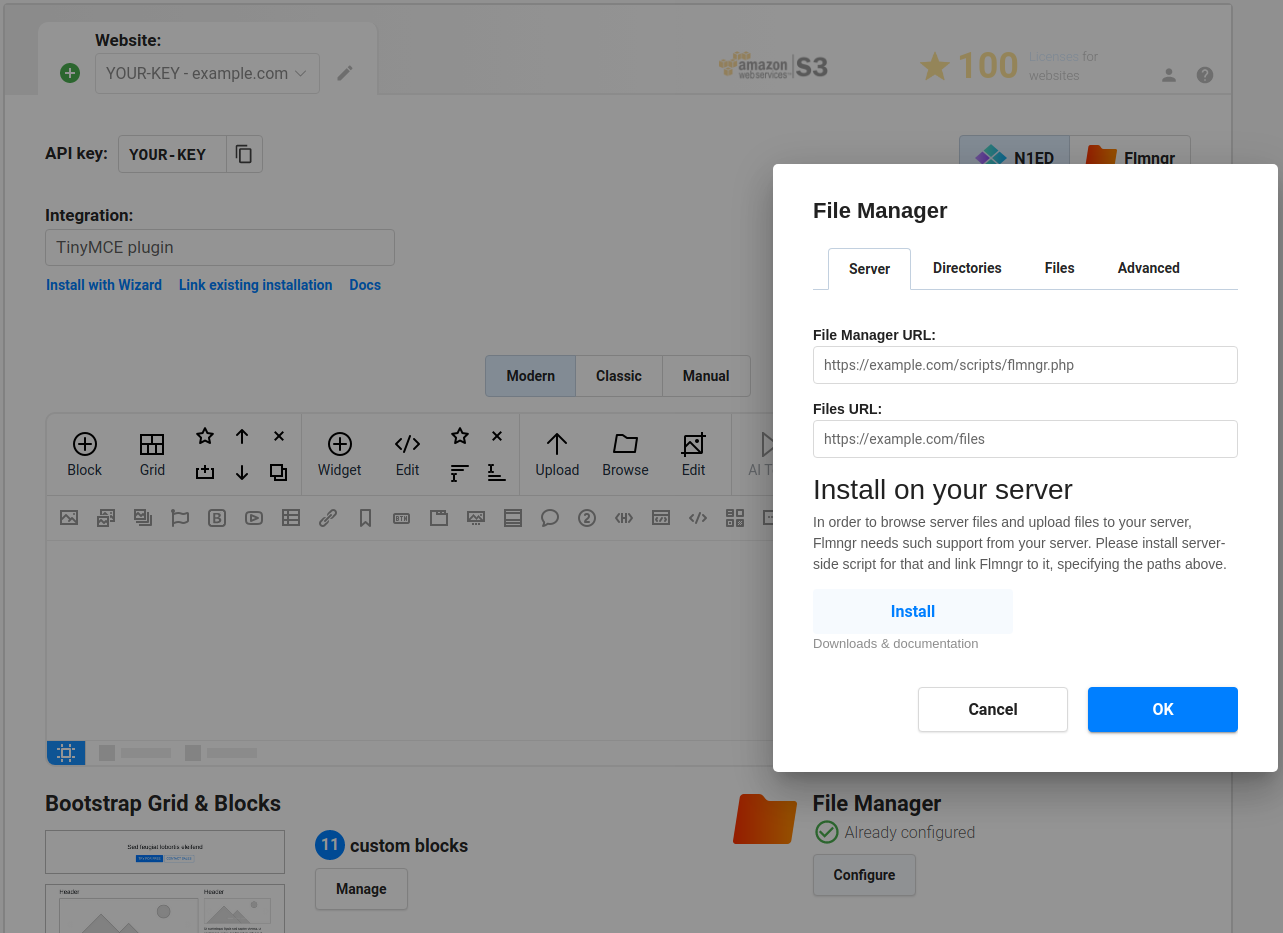
Using the visual Dashboard, you can specify the URLs of your server to link Flmngr with it.
- File Manager URL is the value you use as the endpoint for Flmgnr.
- Files URL is the URL of the publicly available files you serve with NGinx.

Use absolute URLs. While URLs in your routing table may be without a domain, but from the root of your website (e.g., /path), these URLs on the client side (in the Dashboard or config) should be set in the full absolute form (e.g., http://your-domain.com/path) to avoid any possible mistakes.
Note: If you are using a HTTP reverse proxy server like Nginx, please use the URLs that it maps to the internal Nest app.
Note: Alternatively, you can pass these parameters as Flmngr.urlFileManager and Flmngr.urlFiles parameters into the Flmngr config. This is useful when you need to use different directories based on the current user to support multi-user installations.
Files URL explanation
The Files URL option is the prefix that Flmngr will add to any file when inserting it into your content (or returning it in a callback of your API call). If you are able to use Flmngr without any issues, but all inserted images appear broken, please refer to this sample to understand how it works:
Flmngr.urlFiles client-side parameter
http://your-website.com/files//var/www/files//path/to/image.pngMulti-user environment
Flmngr can work in applications where you have many users with different storages. You can programmatically specify Flmngr.urlFiles and dirFiles parameters synchronously with values based on the current user's session.